In this article we will familiarize you with the basic components of the Lemur app and get it up and running on your machine.
We also have a tutorial series on Youtube. These hands-on tutorials let you see Lemur in action, offering tips and tricks you might not find elsewhere. If you prefer learning by watching, this series is the perfect way to get started.
What is Lemur?
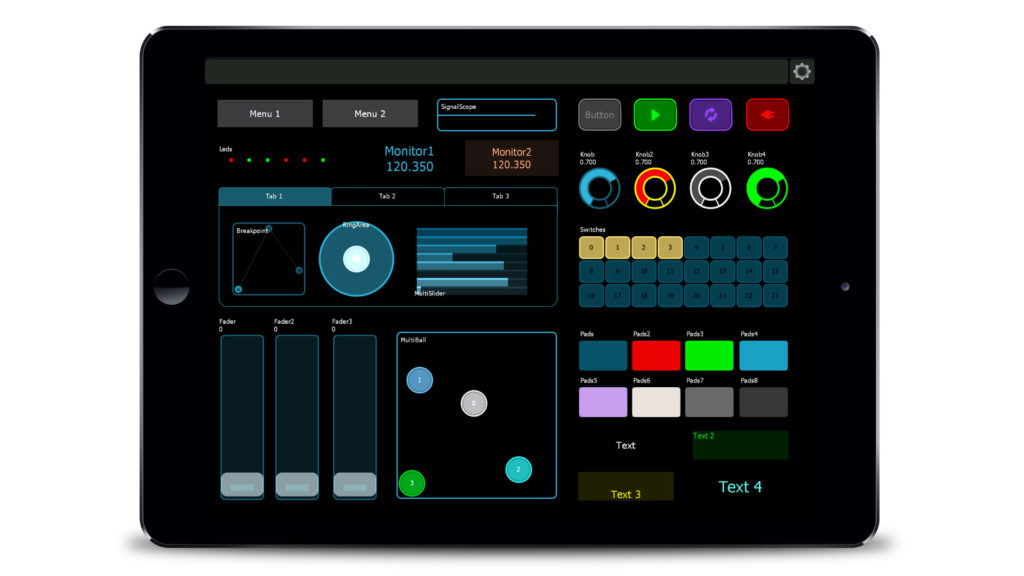
Lemur is an app that allows you to design your own touchscreen controller for your music equipment. Use buttons and sliders and switches (and more!) to design useful layouts to enhance your productivity, and interact with your equipment in new ways.
MIDI and OSC Connectivity
Lemur can talk to pretty much any modern digital music equipment because it transmits standard MIDI messages. Use Lemur to control recording software (DAWs), synths, orchestral sample libraries, live music equipment, mixing consoles, digital instruments, and more! Lemur also supports Open Sound Control (OSC).
The Lemur Editor
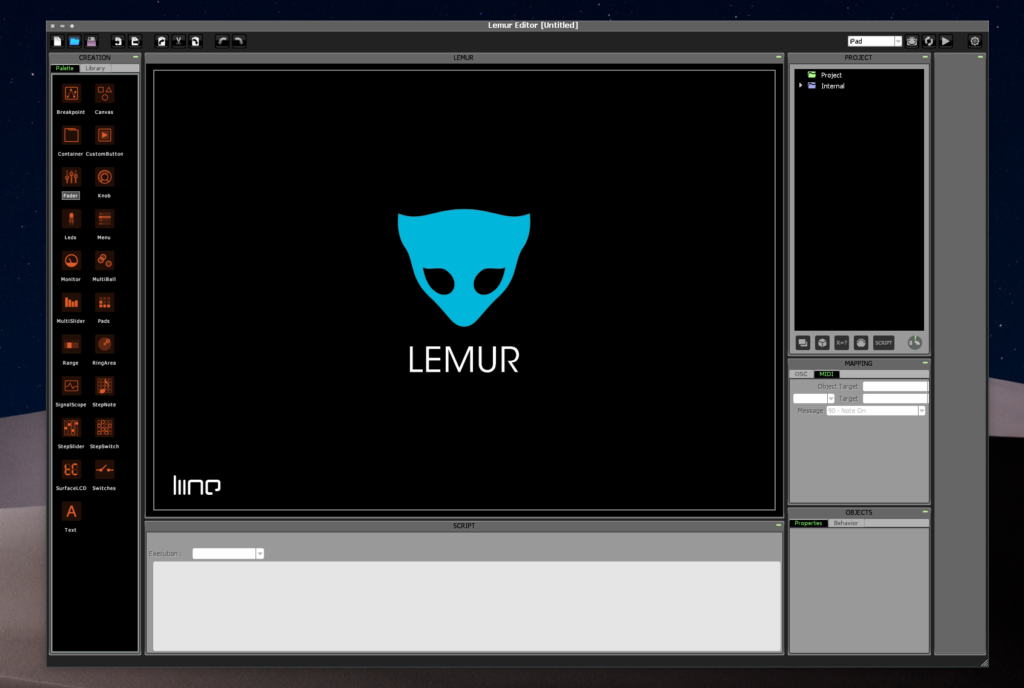
Lemur comes with the Lemur Editor for macOS/Windows which makes it easy to create custom layouts with a simple drag and drop interface. The Lemur Editor stays synchronized to your device while you are editing to give you instant feedback.
Custom Scripts!
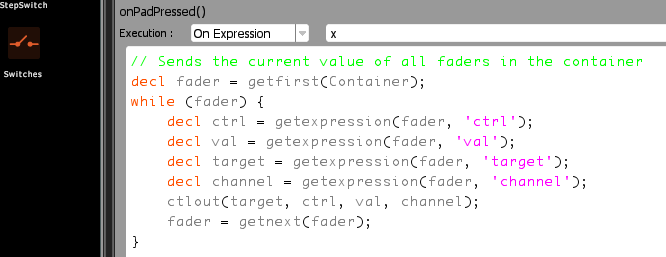
But what makes Lemur uniquely powerful is its deep scripting capabilities. With a little coding, you can create sophisticated controllers that can do almost anything– even custom drawing and animations. Lemur has even been used to make games!
Installing Lemur
- On your mobile device, purchase the Lemur app on the iOS App Store (Android Support coming 2025)
- Next, go to midikinetics.com/lemur and download the Lemur Desktop Software for your Mac/PC. This package contains the Lemur Editor, as well as the Lemur Daemon for making MIDI connections.
- Launch the Lemur App on your device.
- Launch the Lemur Editor and Lemur Daemon on your desktop computer.
Installing MIDI
Lemur communicates using MIDI messages, so you will need to install some way to connect MIDI from your mobile device to your computer. Lemur can connect to 8 MIDI ports simultaneously. There are a number of popular solutions for connecting MIDI to mobile devices, both wired and wireless:
Using the Lemur Editor
Lemur Editor File Types
Lemur projects are just text files with one of two file extensions: .jzml, or .jzlib.
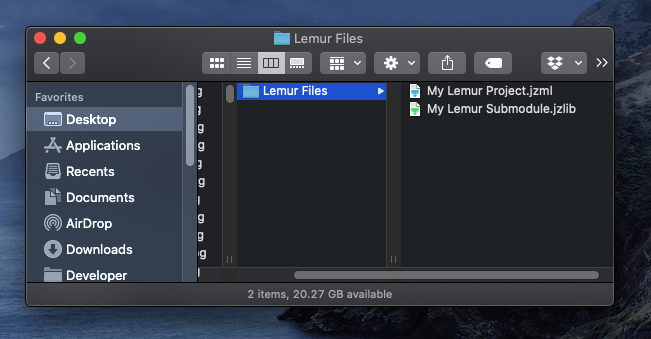
- .jzml files represent entire Lemur projects. To open a .jzml file, simply double-click and it will open in the Lemur Editor.
- .jzlib files represent Lemur submodules. They can be exported and imported to existing .jzml projects. To import a .jzlib file, right click anywhere in the Lemur Editor window and select Import.
Transferring Lemur Editor projects to/from Lemur app:
Once you’ve created a controller you like, you can transfer it wirelessly to the Lemur app.
- In the Lemur Editor, click the Connections Triangle at the top right and select your mobile device from the list.
- Choose Connect to transfer from the Editor to the app.
- Choose Download to transfer from the app to the Editor.

If you don’t see your mobile device in the list of available devices, make sure your PC and your mobile device are on the same network, and that the Lemur app is currently running on your mobile device.
Emulating Touches
While working in the Editor, emulate touches by holding the E key on your computer keyboard while you click.
Making MIDI Connections with Lemur Targets
Often you will want to group related controls onto the same MIDI connection. Use Lemur Targets to define a group. There are 8 Targets, numbered 0-7.
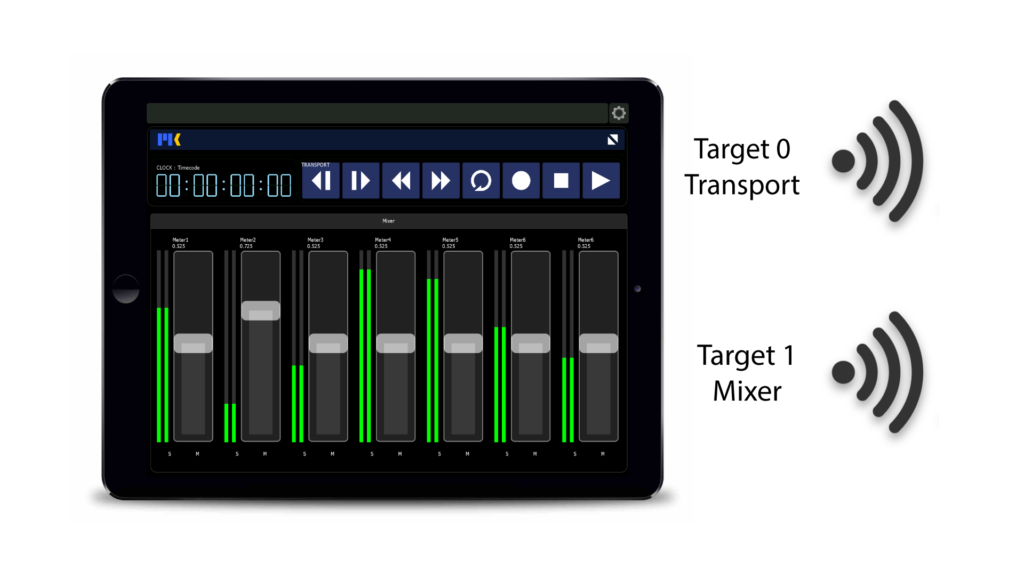
There are 8 Targets, numbered 0-7, allowing you to connect up to 8 separate MIDI devices simultaneously.
To connect a Target to MIDI:
- Launch the Lemur Daemon on your desktop computer.
- Launch Lemur on your mobile device.
- Tap the cog-wheel icon at the top-right corner, and go to More Settings…
- Connect MIDI inputs under the From column.
- Connect MIDI outputs under the To column.
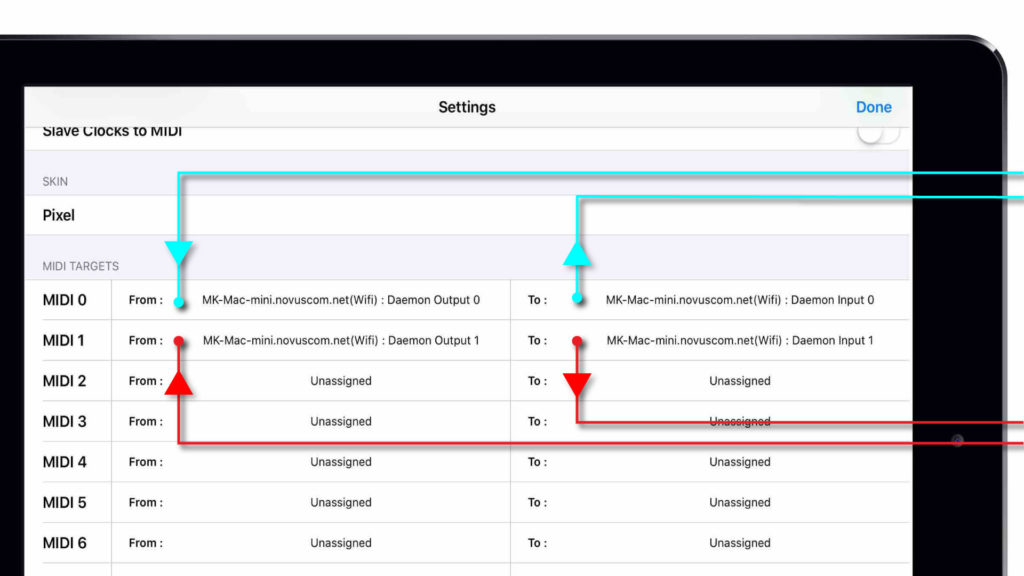
You now have everything you need to get started with Lemur.
Where to go from here?
Lemur is a very deep program, capable of creating the simplest projects with just a few buttons and faders to fully-fledged apps with custom code and graphics! To help you continue your journey, here are some resources and tools to explore Lemur more thoroughly.
The User Guide is still the best resource for learning about Lemur. It contains a detailed breakdown of how Lemur works, examples of different projects, and the full object reference and language specification.
These hands-on tutorials let you see Lemur in action, offering tips and tricks you might not find elsewhere. If you prefer learning by watching, this series is the perfect way to get started.
While the bot is still experimental, you might be surprised at how well it can answer many questions. Do you have something you want to build? The best way to learn about Lemur is to dive in and build it. Tell the bot your idea and have it walk you through each step. Along the way, you can ask it fundamentals about how Lemur works, and have it write custom code. You will need an OpenAI account to use it.
On the GitHub page, you’ll find example projects, and useful modules you can incorporate into your own projects. There you can also find documentation that was used to train the GPT support bot.
The forum contains over a decade’s worth of user-generated content, including tips, troubleshooting advice, and examples of both simple and complex Lemur setups. It’s a great place to connect with others, learn from their experiences, and get help with your projects.
